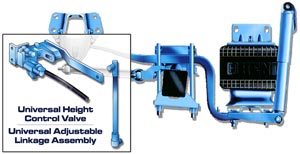
Leveling Valve
An easy way to set-up a Leveling Valve

1. The Vehicle MUST be on level ground to start, and the brakes must be released.
2. On most vehicles, you will need to measure from the bottom of the frame to the ground to obtain the proper starting height. You will need 34″ to 34 1/4″.
3. Neway suspensions will have to be measured from the bottom of the frame to the center of the axle. This is because they have an 8 1/2″, 10 1/2″ and 17 1/2″ hanger height.
4. Peterbilt suspensions will need to be measured from the bottom of the frame to the bottom of the air spring. This is because they use a 12 1/2″, 17″ and 23 1/2″ air spring.
5. Install wood dowels into the top and bottom of the leveling valve and then discharge the air. This will prevent the valve from operating. When the air is exhausted, remove the link.
6. Jack the frame to the 34″ to 34 1/4″ height. This is an average measurement, if you are not sure, check with the manufacturer for correct ride height.
7. Replace the link on the leveling valve.
8. Remove the dowels. The vehicle should be level. If not, check the link for defections or bends, and check the air system and valve. Repair or replace as needed. The suspension operates at 84-90psi. If needed, this can be checked with a valve in the air line.
